The climate in Wausau, WI, makes reliable heating essential for homes in the winter. It also means that energy efficiency is a significant concern, as high heat demand can result in high energy bills. If you’re a homeowner, you can approach your home’s heating efficiency from two directions. One is to invest in the highest-efficiency heating system you can afford. That, however, can be an expensive proposition. The other option is to tighten your home’s air envelope to keep the cold out and heated air in. Here’s what that means and some ways to do it.
What’s an Air Envelope?
Energy efficiency experts often refer to a home’s air envelope when discussing ways to reduce energy waste. The air envelope describes how effectively your home separates indoor air from outdoor air. A well-sealed home helps maintain comfortable temperatures, reduces heating and cooling costs, and improves overall energy efficiency.
Typically, newer homes are built with tighter construction standards, meaning their air envelopes are often better sealed. Older homes may have gaps, leaks, or poorly insulated areas that allow air to escape. However, no matter the age of your home, there are methods you can use to improve energy efficiency. Even small improvements can make a noticeable difference in comfort and energy savings over time.
What To Do To Improve Your Home’s Air Envelope Integrity
There are multiple methods you can use to improve the integrity of your home’s air envelope. Some involve things you can do yourself quite easily. There are others that you’ll need professional help with. Here are some of the strategies you can use, beginning with the easiest to implement.
1. Find and Seal Exterior Cracks
The first and arguably simplest thing you can do to improve your home’s air envelope is to find and seal exterior cracks. Begin by walking around the perimeter of your home. Look for any openings that may allow outside air to enter your exterior walls. The seams around your home’s windows are a common spot that may leak air. Damaged mortar between bricks can also be a source of air leaks.
If you find small gaps around a window, you can seal them with all-weather, exterior caulk. If you find small gaps between bricks or at wall corners, you can use mortar repair sealant instead. However, if your home has extensive brickwork deterioration, you may need a mason’s help. They can point and seal your home’s brickwork to restore its overall integrity.
2. Find and Seal Interior Gaps
Next, inspect the interior surfaces of your home’s exterior-facing walls. Over time, your home may shift slightly on its foundation, creating small cracks in walls and around structural seams. If you’ve already sealed exterior gaps, it’s important to check inside as well.
Pay special attention to window and door frames, as these are common locations for air leaks. Interior latex caulk is ideal for sealing these gaps. You may also find spaces near baseboards, crown molding, or other trim. You should caulk these areas as well to maintain a consistent air barrier.
To help locate hidden leaks, try a simple smoke or flame test. Choose a windy day and turn off your HVAC system. Light an incense stick or candle, and carefully move it near each exterior wall, window, and door frame. Watch the smoke or flame for any flickering or movement caused by drafts. When you see this, it indicates air is escaping, and you’ll know exactly where to apply additional caulk.
3. Install Weatherstripping
Although it’s impossible to keep your home’s doors and windows from letting in air while open, you can improve their performance while closed. The secret to doing that is to install weatherstripping. It provides a compressible seal around your doors and windows, keeping air from passing through. You don’t need much more than a good pair of scissors and some patience to install it. For best results, you may want to install door sweeps on your home’s exterior doors, as well. Those help block drafts under the doors, which weatherstripping alone may not stop.
4. Upgrade Your Attic Insulation
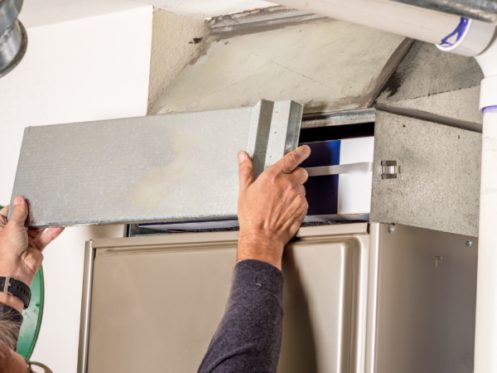
If your home has an unfinished attic, upgrading its insulation is typically a straightforward process. It’s also an effective way to improve your home’s energy efficiency. Since heat rises, blocking heat from passing into your attic is extraordinarily helpful. If you plan to tackle the project yourself, however, you’ll need a pair of sturdy gloves and a respirator. Inhaling insulation particles is hazardous to your health. If possible, leave the job to a professional.
Before installing attic insulation, it’s best to perform a thorough air sealing. Using a combination of caulking and expanding foam, seal any gaps permitting air to pass from your home’s upper floor into the attic. That includes cutouts that allow the passage of ductwork, pipes, or electrical wiring. Afterward, you can add additional insulation to bring your attic’s total insulation R-value to between 49 and 60. The higher you go, the more energy efficient your home becomes.
5. Upgrade Exterior Wall Insullation
Finally, you can upgrade the quality of the insulation of your home’s exterior walls. Unfortunately, this isn’t something the average homeowner can do themselves. There are two main options to improve your exterior wall insulation. You can have your home’s siding replaced and add insulation to your home’s exterior walls in the process. It’s important to note, however, that doing this will involve making significant alterations to your home’s exterior features.
Your other option for improving your home’s exterior wall insulation is the addition of blown-in or spray foam insulation. A professional can add those types of insulation from the inside of your home with minimal disruption. To do it, they’d cut small access holes in strategic spots along your walls. Then, they’d use specialized equipment to push the new loose or spray foam insulation into your walls. Then, they’d repair the access holes and repaint to restore your interior wall surfaces to their original condition.
Additional Considerations
After you’ve taken steps to improve the integrity of your home’s air envelope, your work may not be complete. It’s always wise to follow such an upgrade with an indoor air quality test. That’s because sealing your home may also limit its ventilation, leading to stale, polluted internal air. It can also alter your home’s humidity. An air quality test can reveal what effects, if any, your upgrades had on the quality of your home’s air. If necessary, we can rectify any issues with a combination of solutions. Options include air purifiers, energy recovery ventilators, humidifiers, and dehumidifiers.
Local Heating Efficiency Experts
At Southport Home Services, we have served the residents of Wausau, WI and the surrounding areas since 2005. When you are ready to upgrade your heating system to improve energy efficiency and reduce your monthly utility bills, we can help. You can also count on us for all your indoor air quality needs. Contact us today to schedule an appointment with one of our experienced technicians.


